Categories
WooCommerce WordPress

Want to Highlight Notices on your WooCommerce site? Not a Hassle Anymore!

If you have a business that requires an online store, chances are your site is built on WooCommerce, powered by WordPress. With a market share of 25%, WooCommerce helps you build an eCommerce store using WordPress as the operating system.

Launched in 2011, WooCommerce quickly became the primary solution for users to build their online stores. With features that covered all the necessities mentioned below, WooCommerce has become a go-to platform for online stores.

With features such as:

  • Free
  • Open-sourced
  • User-friendly
  • Extensible and extensive
  • Customizable
  • Secured

— WooCommerce turns your WordPress-powered website into a fully functioning eCommerce store.

As of today, there are requirements for some eCommerce stores to put up instant notifications, updates, promos, etc. For instance, an online clothing store requires a discount notice to be put up. The current WooCommerce functionality is limited to the product description area, where you can hardly put up any eye-catching notice.

CloudRedux, finding and understanding the challenge to put up notices on web stores for their own clientele, came up with the idea to build a plugin that will benefit the requirement.

Product Notices for WooCommerce

This transformative plugin powers your WooCommerce based store and puts up your notice in front of your audience. The “Product Notices for WooCommerce” plugin lets you set up and display notices for products on your WooCommerce-WordPress website. With this plugin, you can set notices globally to display on all products or on a per-product basis.

  • An extensive, one-of its kind, this WooCommerce plugin allows you to set up important notices, highlights, promos, discounts etc. on your webstore.
  • With this plugin you are able to put up two kinds of notices:
    1. Global Notice: These are the notices that you can highlight across your store. This feature allows you to set up notices to show on all the products. It may be some kind of market announcement, alert, or for any other criteria.
    2. Per-Product Notice: This feature allows you to show notices on a per-product basis. The notice may be in the form of promo, discount, or any other criteria. This feature also allows you to hide the global notice from the page, thus allowing custom store notices an easy task.
  • With its inbuilt functionality to change the appearance, you can modify your notice as per your requirement.
  • HTML and shortcodes are fully supported in the notice text field. This gives you better flexibility to be creative while creating notices, promo, alerts or discount notifications.

Downloading the plugin

In case you have the requirement to put up notices or highlight important information on your e-store, you’ll need to download the latest, one-of-its-kind WooCommerce plugin.

Install the plugin by visiting www.cloudredux.com or download directly from the WordPress repository.

Installing and Activating the Plugin

Step 1: After downloading the plugin, head towards the WordPress dashboard > Plugin > Add New

Step 2: Search for Product Notices for WooCommerce in the search bar.

Step 3: Locate and install the plugin.

Step 4: Click to activate the plugin.

Setting up Global Notices

If you are in need to put up important notice across your e-store, you can make it happen with the Global Notices feature. You can put up important notices, announcements, or any updates across every page by default.

After installing and activating the plugin, follow the steps below in order to put up Global Notices

Step 1: On the WordPress dashboard navigate from WooCommerce > Settings > Product Notice

Step 2: Add your custom content in the text area

Step 3: Select appropriate appearance for your notice

Step 4: Save the changes

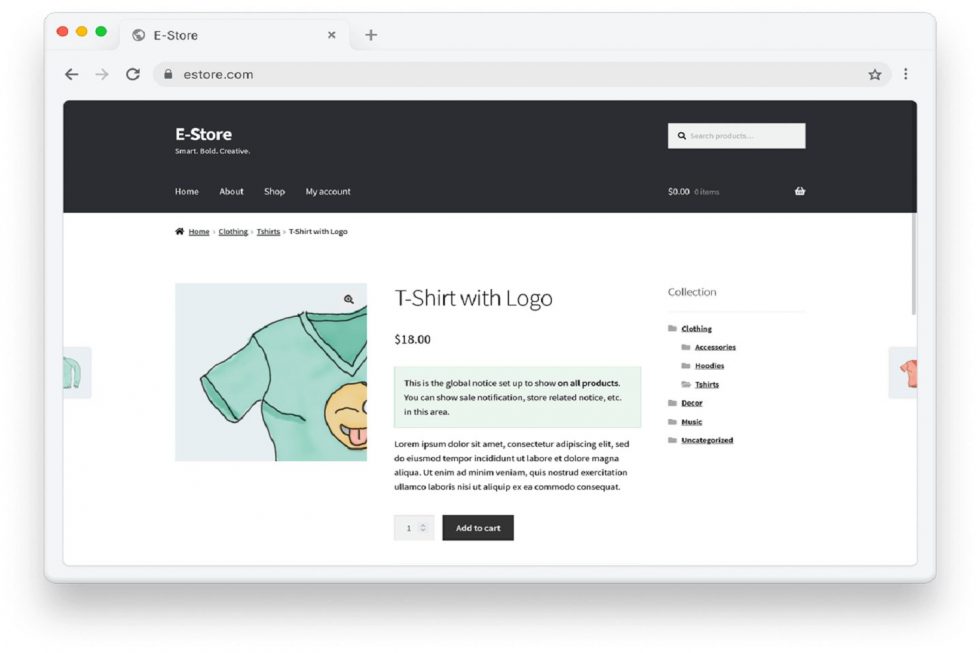
Your Global Notice will be set up as shown in the figure below.

Setting up Per-Product Notices

If you do not want to display a notice on all of the products, you can set up notices on a per-product basis. In order to do so, follow these steps:

Step 1: Head to the Edit Product screen > Product Notice/Information meta box

Step 2: Add the relevant content in the Notice text field

Step 3: Choose from a set of default appearance styles to set up how your notice shows up on the page

Step 4: Save the changes

The final view of the update will look like the image below:

Disabling Global Notices on Product Pages

In case you would like to selectively disable the Global notice on one or more products, you can do so by following the instructions below: 

Step 1: Head towards the product on which you want to disable Global Notice

Step 2: Navigate to the Disable Global Notice meta box.

Step 3: Select the check box to hide the global notice.

Step 3: Save and Update

You’ll notice that the global notice no longer shows up on the product page. Any notice added specifically to that page will still be displayed.

To get an idea, see the image below:

Wrapping up!

Now that you have the option to communicate better with your users, make sure you make the best use out of it. With our unique WooCommerce plugin, make your news available to users easily.

We, at CloudRedux, aim towards contributing to society as it gives us back a platform to build on. With this plugin being the first step towards transformation, our goal is to deliver many more unique innovations.

Categories
WooCommerce WordPress

Adding and Sending Custom WooCommerce Email for WooCommerce 3.0+

WooCommerce 3.0 was rolled out with lots of exciting features for end-users as well as developers. Several advancements including use of CRUD classes and others were introduced with this release to make WooCommerce more performance-friendly.

This also lead to changes in the way interaction between post types, taxonomies and related data happens. In one of our previous articles we showed you how could you (without using any plugin) add and send custom WooCommerce emails. And as we continually receive comments and requests about modifying the code to also make it compatible with WooCommerce 3.0+, I decided to quickly (yeah, I know this is very late 🙁 ) get onto this.

This tutorial has been tested to work with WooCommerce 3.0+. So, if you are looking to add and send custom emails in WooCommerce 3.0+, follow the instructions below.

First things first!

It is highly recommended that any customization be kept separate from the theme. A plugin like WP Designer could come in handy if you want to add such a customization. This example requires you to FTP into your website and create custom directories and files inside wp-content > uploads directory. Following is a list of directories and files that need to be created:

  1. Create directory crwc-custom-emails inside wp-content > uploads.
  2. Create file crwc-email-functions.php in the root of crwc-custom-emails directory (crwc-custom-emails > crwc-email-functions.php).
  3. Create file class-crwc-welcome-email.php in the root of crwc-custom-emails directory (crwc-custom-emails > class-crwc-welcome-email.php).
  4. Create a sub-directory emails inside crwc-custom-emails directory.
  5. Create a new file crwc-welcome-email.php inside the emails directory (crwc-custom-emails > emails > crwc-welcome-email.php).
  6. You can also choose to create a sub-directory plain inside emails directory and then create crwc-welcome-email.php file inside plain directory (crwc-custom-emails > emails > plain > crwc-welcome-email.php). This will be used in case emails use plain content-type.

Building custom email class

The custom email class that we create would actually define the email trigger plus the email content. We can extend the default WC_Email class and hence make use of all of the parent email class methods & members that are available. This makes life really easy 😉

Add the following code to class-crwc-welcome-email.php file.

<pre class="EnlighterJSRAW" data-enlighter-language="php" data-enlighter-theme="" data-enlighter-highlight="" data-enlighter-linenumbers="" data-enlighter-lineoffset="" data-enlighter-title="" data-enlighter-group="">&lt;?php
if ( ! defined( 'ABSPATH' ) ) exit; // Exit if accessed directly
if ( class_exists( 'WC_Email' ) ) :
class CRWC_Welcome_Email extends WC_Email {
	
	/**
	 * Set email defaults
	 */
	public function __construct() {
		// Unique ID for custom email
		$this-&gt;id = 'crwc_welcome_email';
		// Is a customer email
		$this-&gt;customer_email = true;
		
		// Title field in WooCommerce Email settings
		$this-&gt;title = __( 'Welcome Email', 'woocommerce' );
		// Description field in WooCommerce email settings
		$this-&gt;description = __( 'Welcome email is sent when an online training program account is created for the customer after the purchase of the online course.', 'woocommerce' );
		// these define the locations of the templates that this email should use, we'll just use the new order template since this email is similar
		$upload_dir = wp_upload_dir();
		
		$this-&gt;template_base  = WPD_BASE_DIR . '/wc-emails/';	// Fix the template base lookup for use on admin screen template path display
		$this-&gt;template_html  = 'emails/crwc-welcome-email.php';
		$this-&gt;template_plain = 'emails/plain/crwc-welcome-email.php';
		$this-&gt;placeholders   = array(
			'{site_title}'   =&gt; $this-&gt;get_blogname(),
			'{order_date}'   =&gt; '',
			'{order_number}' =&gt; '',
		);
		// Trigger email when payment is complete
		add_action( 'woocommerce_payment_complete', array( $this, 'trigger' ) );
		add_action( 'woocommerce_order_status_on-hold_to_processing_notification', array( $this, 'trigger' ) );
		add_action( 'woocommerce_order_status_on-hold_to_completed_notification', array( $this, 'trigger' ) );
		add_action( 'woocommerce_order_status_failed_to_processing_notification', array( $this, 'trigger' ) );
		add_action( 'woocommerce_order_status_failed_to_completed_notification', array( $this, 'trigger' ) );
		add_action( 'woocommerce_order_status_pending_to_processing_notification', array( $this, 'trigger' ) );
		
		// Call parent constructor to load any other defaults not explicity defined here
		parent::__construct();
	}
	/**
	 * Get email subject.
	 *
	 * @since  3.1.0
	 * @return string
	 */
	public function get_default_subject() {
		return __( 'XYZ Online Training Program', 'woocommerce' );
	}
	/**
	 * Get email heading.
	 *
	 * @since  3.1.0
	 * @return string
	 */
	public function get_default_heading() {
		return __( 'Welcome to Online Training Program', 'woocommerce' );
	}
	/**
	 * Prepares email content and triggers the email
	 *
	 * @param int $order_id
	 */
	public function trigger( $order_id, $order = false ) {
		if ( $order_id &amp;&amp; ! is_a( $order, 'WC_Order' ) ) {
			$order = wc_get_order( $order_id );
		}
			
		if ( is_a( $order, 'WC_Order' ) ) {
			
			$this-&gt;object = $order;
			
			$this-&gt;placeholders['{order_date}']   = wc_format_datetime( $this-&gt;object-&gt;get_date_created() );
			$this-&gt;placeholders['{order_number}'] = $this-&gt;object-&gt;get_order_number();
		
			//* Maybe include an additional check to make sure that the online training program account was created
			/* Uncomment and add your own conditional check
			$online_training_account_created = get_post_meta( $order_id, '_crwc_user_account_created', 1 );
			
			if ( ! empty( $online_training_account_created ) &amp;&amp; false === $online_training_account_created ) {
				return;
			}
			*/
			/* Proceed with sending email */
			
			$this-&gt;recipient = $this-&gt;object-&gt;get_billing_email();
		}
		// Send welcome email only once and not on every order status change		
		if ( get_post_meta( $order_id, '_crwc_welcome_email_sent', true ) ) {
			return;
		}
		if ( ! $this-&gt;is_enabled() || ! $this-&gt;get_recipient() ) {
			
			return;
		}
		// All well, send the email
		$this-&gt;send( $this-&gt;get_recipient(), $this-&gt;get_subject(), $this-&gt;get_content(), $this-&gt;get_headers(), $this-&gt;get_attachments() );
		
		// add order note about the same
		$this-&gt;object-&gt;add_order_note( sprintf( __( '%s email sent to the customer.', 'woocommerce' ), $this-&gt;get_title() ) );
		// Set order meta to indicate that the welcome email was sent
		update_post_meta( $order_id, '_crwc_welcome_email_sent', 1 );
		
	}
	
	/**
	 * get_content_html function.
	 *
	 * @return string
	 */
	public function get_content_html() {
		return wc_get_template_html( $this-&gt;template_html, array(
			'order'			=&gt; $this-&gt;object,
			'email_heading'		=&gt; $this-&gt;get_heading(),
			'sent_to_admin'		=&gt; false,
			'plain_text'		=&gt; false,
			'email'			=&gt; $this
		) );
	}
	/**
	 * get_content_plain function.
	 *
	 * @return string
	 */
	public function get_content_plain() {
		return wc_get_template_html( $this-&gt;template_plain, array(
			'order'			=&gt; $this-&gt;object,
			'email_heading'		=&gt; $this-&gt;get_heading(),
			'sent_to_admin'		=&gt; false,
			'plain_text'		=&gt; true,
			'email'			=&gt; $this
		) );
	}
	/**
	 * Initialize settings form fields
	 */
	public function init_form_fields() {
		$this-&gt;form_fields = array(
			'enabled'    =&gt; array(
				'title'   =&gt; __( 'Enable/Disable', 'woocommerce' ),
				'type'    =&gt; 'checkbox',
				'label'   =&gt; 'Enable this email notification',
				'default' =&gt; 'yes'
			),
			'subject'    =&gt; array(
				'title'       =&gt; __( 'Subject', 'woocommerce' ),
				'type'        =&gt; 'text',
				'desc_tip'    =&gt; true,
				'description' =&gt; sprintf( 'This controls the email subject line. Leave blank to use the default subject: &lt;code&gt;%s&lt;/code&gt;.', $this-&gt;get_subject() ),
				'placeholder' =&gt; $this-&gt;get_default_subject(),
				'default'     =&gt; ''
			),
			'heading'    =&gt; array(
				'title'       =&gt; __( 'Email Heading', 'woocommerce' ),
				'type'        =&gt; 'text',
				'desc_tip'    =&gt; true,
				'description' =&gt; sprintf( __( 'This controls the main heading contained within the email notification. Leave blank to use the default heading: &lt;code&gt;%s&lt;/code&gt;.' ), $this-&gt;get_heading() ),
				'placeholder' =&gt; $this-&gt;get_default_heading(),
				'default'     =&gt; ''
			),
			'email_type' =&gt; array(
				'title'			=&gt; __( 'Email type', 'woocommerce' ),
				'type'			=&gt; 'select',
				'description'	=&gt; __( 'Choose which format of email to send.', 'woocommerce' ),
				'default'		=&gt; 'html',
				'class'			=&gt; 'email_type wc-enhanced-select',
				'options'		=&gt; $this-&gt;get_email_type_options(),
				'desc_tip'		=&gt; true,
			)
		);
	}
		
}
endif;</pre>

Viewing custom email settings

The code mentioned above will help us to create custom class with all settings and triggers. However, to be able to see the custom email settings that we created along with the default emails on WooCommerce Emails screen under WooCommerce > Settings > Emails, we’ll need to add this class to the default email classes in WooCommerce. In order to do that, we’ll make use of the woocommerce_email_classes filter to include custom email class to the default classes.

Add the following code to crwc-email-functions.php file (inside crwc-custom-emails directory).

<pre class="EnlighterJSRAW" data-enlighter-language="php" data-enlighter-theme="" data-enlighter-highlight="" data-enlighter-linenumbers="" data-enlighter-lineoffset="" data-enlighter-title="" data-enlighter-group="">add_filter( 'woocommerce_email_classes', 'crwc_custom_woocommerce_emails' );
function crwc_custom_woocommerce_emails( $email_classes ) {
	//* Custom welcome email to customer when purchasing online training program
	$upload_dir = wp_upload_dir();
	
	include_once( $upload_dir['basedir'] . '/crwc-custom-emails/class-crwc-welcome-email.php' );
	
	$email_classes['CRWC_Welcome_Email'] = new CRWC_Welcome_Email(); // add to the list of email classes that WooCommerce loads
	return $email_classes;
	
}</pre>

Now, when you navigate to WooCommerce > Settings > Emails, you should be able to see the custom email Welcome Email that we added to the list of emails on that page. If you click on the Configure button, you will find settings screen that allows you to enable/disable the email, edit/update the email subject and heading and choose the email content type since we added these settings in the custom class we created above.

Creating custom email template

Until this point, we have been able to create email class that helps create email trigger and set-up email content and we have also been able to add our custom email to the WooCommerce Emails screen. We still need to define the email template that will be used for the email content. The paths to the email content templates have already been defined in the custom email class we created above. Let’s add the actual content that will be used by the welcome email we send out to customers.

Add the following code to crwc-welcome-email.php file (inside emails directory).

<pre class="EnlighterJSRAW" data-enlighter-language="php" data-enlighter-theme="" data-enlighter-highlight="" data-enlighter-linenumbers="" data-enlighter-lineoffset="" data-enlighter-title="" data-enlighter-group="">&lt;?php
/**
 *
 * Welcome email content template
 *
 * The file is prone to modifications after plugin upgrade or alike; customizations are advised via hooks/filters
 *
 */
 
if ( ! defined( 'ABSPATH' ) ) {
	exit;
}
/**
 * @hooked WC_Emails::email_header() Output the email header
 */
do_action( 'woocommerce_email_header', $email_heading, $email ); ?&gt;
&lt;p&gt;&lt;?php _e( 'Thank you for your purchase of Online training course. Your account has been successfully created over the Online Training Program portal.', 'woocommerce' ); ?&gt;&lt;/p&gt;
&lt;p&gt;&lt;?php _e( 'Use the following credentials to login to the portal:', 'woocommerce' ); ?&gt;&lt;/p&gt;
&lt;p&gt;
	&lt;strong&gt;&lt;?php __( 'Login URL: ', 'woocommerce' ) ?&gt;&lt;/strong&gt;&lt;?php _e( 'https://example.com' ); ?&gt;&lt;br /&gt;
	&lt;strong&gt;&lt;?php __( 'Username: ', 'woocommerce' ) ?&gt;&lt;/strong&gt;&lt;?php echo make_clickable( esc_attr( $order-&gt;get_billing_email() ) ); ?&gt;&lt;br /&gt;
&lt;/p&gt;
&lt;p&gt;&lt;?php _e( 'Below are the order details for your reference.' ) ?&gt;&lt;/p&gt;
&lt;?php
/**
* @hooked WC_Emails::order_details() Shows the order details table.
* @hooked WC_Emails::order_schema_markup() Adds Schema.org markup.
* @since 2.5.0
*/
do_action( 'woocommerce_email_order_details', $order, $sent_to_admin, $plain_text, $email );
/**
* @hooked WC_Emails::order_meta() Shows order meta data.
*/
do_action( 'woocommerce_email_order_meta', $order, $sent_to_admin, $plain_text, $email );
/**
* @hooked WC_Emails::customer_details() Shows customer details
* @hooked WC_Emails::email_address() Shows email address
*/
do_action( 'woocommerce_email_customer_details', $order, $sent_to_admin, $plain_text, $email );
/**
 * @hooked WC_Emails::email_footer() Output the email footer
 */
do_action( 'woocommerce_email_footer', $email );</pre>

You can modify the email content template as required based on your specific requirements and accordingly, the details that you’d need to send out to your customers.

Start making Custom WooCommerce email work

We’re almost there with starting to send custom WooCommerce emails to the customers. All we need to do is to trigger our code. The filter we added to include our custom email class to list of default email classes is placed in crwc-email-functions.php, but hey!, wait a sec.. did we actually include it so that it is executed by WordPress? No, not yet. Let’s do that.

In order to do so, you can just add the following code to your theme’s functions.php:

<pre class="EnlighterJSRAW" data-enlighter-language="php" data-enlighter-theme="" data-enlighter-highlight="" data-enlighter-linenumbers="" data-enlighter-lineoffset="" data-enlighter-title="" data-enlighter-group="">$upload_dir = wp_upload_dir();
include_once( $upload_dir['basedir'] . '/crwc-custom-emails/crwc-email-functions.php' );</pre>

That’s it! Now on, when a customer purchases an online training product from your store, he would receive a welcome email with his credentials. Cheers!

Categories
Beginner WordPress

WordPress: An Introduction To The Easiest & Most Powerful Content Management System

WordPress, the most popular and versatile Content Management System today, was initially released with one purpose of blogging. As soon as it arrived, users couldn’t stop gushing praise about it, which eventually created a fad among the users. Today, WordPress enables bloggers to create an entire website for themselves, which can easily be updated and modified.

There are over 1 billion websites on the internet and the giant platform covers ~31% of the internet today. That number is incredible. It has evolved from a publishing platform to a user-friendly CMS.

WordPress is easier for every individual, even for a layman because of its short learning curve, which has led WordPress to become the most distinguished and widely used CMS today. While the world is using WordPress, others are pining for it and the rest of them are just oblivious to its abilities. It would be unfair to say if WordPress entirely vanquished Joomla and Drupal as they are two of the most used CMSs. But every developer would concede that WordPress is the easiest CMS out there.

The best way to learn WordPress is to use it and get used to it, so let’s get to know WordPress a little more.

WordPress.Com v/s WordPress.Org?

TBH, WordPress.Com & WordPress.Org, both are a bit daunting for new users. Simply put, WordPress.Org is self-hosted and WordPress.Com is a service managed by Automattic (the company behind WordPress). WordPress is like any other software that can be downloaded and installed on your internet server. However, setting up an internet server itself, is a hectic job for a naïve user. That is where WordPress.Com helps you!

It is hypothesized that WordPress.Org & WordPress.Com are same entities. However, they are significantly different.

With WordPress.com, you sign up, set-up your profile, choose a theme and start blogging. Voila! That’s easy! A major plus point is that Automattic is managing all the “other-things” for the user. Things like hosting the site, performing backups & maintenance, security, spam control and performance optimization, etc. will all be a part of their job and not yours. All these tasks can be pretty much burdensome when you’re busy running a business or creating content.

This brings us to WordPress.Org, where all the things listed above will solely be your part to play. You will have to find a host and do a bang-up job of finding and setting-up a server, hosting the website, security, themes, plugins and backups and the rest of the stuff, for there’s no one else to pay heed to it, giving you more power, control and authority over your website. With WordPress.Org, it is more like taming your own animal which has rather more potential and you have the control to unleash that. You can always choose between thousands and thousands of themes, plugins, structure your website as and when you want and even scale-up your WordPress installation based on your performance requirements.

Themes & Plugins

WordPress has ever-growing number of themes and plugins which makes your website look pleasing and adds special features to it. Our developer explains “Your WordPress website is an HTML skeleton until you put some skin and clothes to it using themes and plugins“. That’s a good perspective, though. Using a theme, everything from background color to font could be extensively customized which changes the website’s appearance.

The best part about it is that there are free as well as premium (paid) themes. The only difference between a free and a premium theme is that the latter provides more features and functionality plus support than a free theme. Free themes are built to cater to a specific purpose and are meant to be installed, activated and use them as is, typically with some kind of limitation. This is one reason why developers prefer premium themes over free themes.

A plugin, generally helps to fulfill the need of an added functionality to a website. In WordPress fashion, there are various plugins to help you add a plethora of features to your website. For instance, to make sure your website stays safe from potential spam, malware and other attacks, you may want to install a security plugin on your website. A website may require a name-your-fantasy feature, or a pop-up that’s when those plugins come to your rescue.

Power of WordPress

WordPress is multilingual and is available in more than 70 languages. Its one-click installation and upgrade is worth it. WordPress has an enthusiastic and open community where developers from around the world collaborate and enjoy discussions on its features. It’s an easy task to customize and change the appearance of your site using themes and plugins. The extensibility of WordPress has a vast horizon because of the various plugins available.

WordPress offers you the flexibility to create any kind of  website not limited to blogging, photography or a personal website but a full-fledged website such as an eCommerce store, news or government website.

Publishing a post and creating a page are two tasks which can be performed effortlessly. WordPress provides the facility to create posts and schedule them, protect them with a password (if required) and what not. It lets you make your content public or private. When the website grows, there may be a need for multiple users to collaborate and manage it, in such a case, you can add and assign roles to users such as administrators, authors, editors, etc.

These are just the basics of WordPress and there is so much more to WordPress. Today, WordPress is not only a blogging tool, it has evolved into a platform which can help you power your business online and establish your online presence. And there is enough room for limitless opportunities when it comes to developing with WordPress.

Besides this, most of the brands like Time Inc., The New Yorker, LinkedIn, Sony Music, Forbes, etc. are already using WordPress to build and grow their businesses.

Are you using WordPress yet? If not, you’re missing out on something big. And for the ones who are into WordPress, your game is up and strong.

Happy Blogging!

Categories
WooCommerce WordPress

Adding and Sending Custom WooCommerce Email (without a plugin)

This tut has been updated to work with WooCommerce 3.0+. Read how can you add and send custom WooCommerce email for WooCommerce version 3.0 and higher.

Emails are pretty important when you have customers purchasing products from your online store. Customers buying your products (even us, when we make an online purchase), be it physical or virtual, expect to receive some sort of emails about the confirmation of payment, the processing of order and so on. If your store fails to do so, you’re probably doing it wrong and making your business suffer. Because, the customer has just sent you his money and they’ve not yet heard back from you, they’ve not received a payment confirmation. Get the problem?

If you’re selling with WordPress & WooCommerce, things are quite easy for you as a store owner/manager. WooCommerce, by default, sends out some emails to let your customers know that their order has been placed, processed and/or is complete. However, sometimes it may happen that based on the products you’re selling, you may need to send out custom emails to the customers once they’ve placed an order on your site.

Practical Example

For instance, let’s say, you have a WordPress & WooCommerce powered online store that allows customers to purchase a course on your website and in-turn grants them access to your online training program.

In such a case, you may want to send out a Welcome Email to the customers informing them about the purchase and sharing access details for the online training program. In order to be able to do so, we’ll need to add a custom WooCommerce email that triggers every time a new order is placed on the site. WooCommerce 2.0 introduced a whole bunch of new features, including the ability to add a new class-based implementation for emails. In this article, we’ll use the WooCommerce email class implementation to add a custom email which is triggered on every new order once the payment has been received.

Side Note

The example cited above may also require custom implementation that allows interaction between WooCommerce and (possibly the API to connect to) your online training program to allow adding new user accounts when a customer makes a purchase at your online store. This article does not cover the integration to a third-party service part, and is strictly intended to guide you on how can a custom email be added and sent through your WooCommerce store.

Implementation

Duh.. Enough Talk! Let’s Implement That

Implementation of custom email is divided into three phases:

  1. Extending WC_Email class to define the email header, subject, email template for content, etc.
  2. Adding our custom email class to the default WooCommerce email classes using woocommerce_email_classes filter
  3. Creating our own email template to be used to generate email content for our custom email.

Let’s get started.

First things first!

It is highly recommended that any customization be kept separate from the theme. A plugin like WP Designer could come in handy if you want to add such a customization. This example requires you to FTP into your website and create custom directories and files inside wp-content > uploads directory. Following is a list of directories and files that need to be created:

  1. Create directory crwc-custom-emails inside wp-content > uploads.
  2. Create file crwc-email-functions.php in the root of crwc-custom-emails directory (crwc-custom-emails > crwc-email-functions.php).
  3. Create file class-crwc-welcome-email.php in the root of crwc-custom-emails directory (crwc-custom-emails > class-crwc-welcome-email.php).
  4. Create a sub-directory emails inside crwc-custom-emails directory.
  5. Create a new file crwc-welcome-email.php inside the emails directory (crwc-custom-emails > emails > crwc-welcome-email.php).
  6. You can also choose to create a sub-directory plain inside emails directory and then create crwc-welcome-email.php file inside plain directory (crwc-custom-emails > emails > plain > crwc-welcome-email.php). This will be used in case emails use plain content-type.

Building custom email class

The custom email class that we create would actually define the email trigger plus the email content. We can extend the default WC_Email class and hence make use of all of the parent email class methods & members that are available. This makes life really easy 😉

Add the following code to class-crwc-welcome-email.php file.

<?php

if ( ! defined( 'ABSPATH' ) ) exit; // Exit if accessed directly

/**
 * Welcome Email class used to send out welcome emails to customers purchasing a course
 *
 * @extends \WC_Email
 */

class CRWC_Welcome_Email extends WC_Email {
	
	/**
	 * Set email defaults
	 */
	public function __construct() {

		// Unique ID for custom email
		$this->id = 'crwc_welcome_email';

		// Is a customer email
		$this->customer_email = true;
		
		// Title field in WooCommerce Email settings
		$this->title = __( 'Welcome Email', 'woocommerce' );

		// Description field in WooCommerce email settings
		$this->description = __( 'Welcome email is sent when an online training program account is created for the customer after the purchase of the online course.', 'woocommerce' );

		// Default heading and subject lines in WooCommerce email settings
		$this->subject = apply_filters( 'crwc_welcome_email_default_subject', __( 'XYZ Online Training Program', 'woocommerce' ) );
		$this->heading = apply_filters( 'crwc_welcome_email_default_heading', __( 'Welcome to Online Training Program', 'woocommerce' ) );
		
		// these define the locations of the templates that this email should use, we'll just use the new order template since this email is similar
		$upload_dir = wp_upload_dir();
		
		$this->template_base  = $upload_dir['basedir'] . '/crwc-custom-emails/';	// Fix the template base lookup for use on admin screen template path display
		$this->template_html  = 'emails/crwc-welcome-email.php';
		$this->template_plain = 'emails/plain/crwc-welcome-email.php';

		// Trigger email when payment is complete
		add_action( 'woocommerce_payment_complete', array( $this, 'trigger' ) );
		add_action( 'woocommerce_order_status_on-hold_to_processing', array( $this, 'trigger' ) );
		add_action( 'woocommerce_order_status_on-hold_to_completed', array( $this, 'trigger' ) );
		add_action( 'woocommerce_order_status_failed_to_processing', array( $this, 'trigger' ) );
		add_action( 'woocommerce_order_status_failed_to_completed', array( $this, 'trigger' ) );
		add_action( 'woocommerce_order_status_pending_to_processing', array( $this, 'trigger' ) );
		
		// Call parent constructor to load any other defaults not explicity defined here
		parent::__construct();

	}


	/**
	 * Prepares email content and triggers the email
	 *
	 * @param int $order_id
	 */
	public function trigger( $order_id ) {

		// Bail if no order ID is present
		if ( ! $order_id )
			return;
		
		// Send welcome email only once and not on every order status change		
		if ( ! get_post_meta( $order_id, '_crwc_welcome_email_sent', true ) ) {
			
			// setup order object
			$this->object = new WC_Order( $order_id );
			
			// get order items as array
			$order_items = $this->object->get_items();

			//* Maybe include an additional check to make sure that the online training program account was created
			/* Uncomment and add your own conditional check
			$online_training_account_created = get_post_meta( $this->object->id, '_crwc_user_account_created', 1 );
			
			if ( ! empty( $online_training_account_created ) && false === $online_training_account_created ) {
				return;
			}
			*/

			/* Proceed with sending email */
			
			$this->recipient = $this->object->billing_email;

			// replace variables in the subject/headings
			$this->find[] = '{order_date}';
			$this->replace[] = date_i18n( woocommerce_date_format(), strtotime( $this->object->order_date ) );

			$this->find[] = '{order_number}';
			$this->replace[] = $this->object->get_order_number();

			if ( ! $this->is_enabled() || ! $this->get_recipient() ) {
				return;
			}

			// All well, send the email
			$this->send( $this->get_recipient(), $this->get_subject(), $this->get_content(), $this->get_headers(), $this->get_attachments() );
			
			// add order note about the same
			$this->object->add_order_note( sprintf( __( '%s email sent to the customer.', 'woocommerce' ), $this->title ) );

			// Set order meta to indicate that the welcome email was sent
			update_post_meta( $this->object->id, '_crwc_welcome_email_sent', 1 );
			
		}
		
	}
	
	/**
	 * get_content_html function.
	 *
	 * @return string
	 */
	public function get_content_html() {
		return wc_get_template_html( $this->template_html, array(
			'order'			=> $this->object,
			'email_heading'		=> $this->email_heading( $this->course_info['program'] ),
			'sent_to_admin'		=> false,
			'plain_text'		=> false,
			'email'			=> $this
		) );
	}


	/**
	 * get_content_plain function.
	 *
	 * @return string
	 */
	public function get_content_plain() {
		return wc_get_template_html( $this->template_plain, array(
			'order'			=> $this->object,
			'email_heading'		=> $this->email_heading( $this->course_info['program'] ),
			'sent_to_admin'		=> false,
			'plain_text'		=> true,
			'email'			=> $this
		) );
	}


	/**
	 * Initialize settings form fields
	 */
	public function init_form_fields() {

		$this->form_fields = array(
			'enabled'    => array(
				'title'   => __( 'Enable/Disable', 'woocommerce' ),
				'type'    => 'checkbox',
				'label'   => 'Enable this email notification',
				'default' => 'yes'
			),
			'subject'    => array(
				'title'       => __( 'Subject', 'woocommerce' ),
				'type'        => 'text',
				'description' => sprintf( 'This controls the email subject line. Leave blank to use the default subject: <code>%s</code>.', $this->subject ),
				'placeholder' => '',
				'default'     => ''
			),
			'heading'    => array(
				'title'       => __( 'Email Heading', 'woocommerce' ),
				'type'        => 'text',
				'description' => sprintf( __( 'This controls the main heading contained within the email notification. Leave blank to use the default heading: <code>%s</code>.' ), $this->heading ),
				'placeholder' => '',
				'default'     => ''
			),
			'email_type' => array(
				'title'       => __( 'Email type', 'woocommerce' ),
				'type'        => 'select',
				'description' => __( 'Choose which format of email to send.', 'woocommerce' ),
				'default'       => 'html',
				'class'         => 'email_type wc-enhanced-select',
				'options'     => array(
					'plain'	    => __( 'Plain text', 'woocommerce' ),
					'html' 	    => __( 'HTML', 'woocommerce' ),
					'multipart' => __( 'Multipart', 'woocommerce' ),
				)
			)
		);
	}
		
}

Viewing custom email settings

The code mentioned above will help us to create custom class with all settings and triggers. However, to be able to see the custom email settings that we created along with the default emails on WooCommerce Emails screen under WooCommerce > Settings > Emails, we’ll need to add this class to the default email classes in WooCommerce. In order to do that, we’ll make use of the woocommerce_email_classes filter to include custom email class to the default classes.

Add the following code to crwc-email-functions.php file (inside crwc-custom-emails directory).

<?php

add_filter( 'woocommerce_email_classes', 'crwc_custom_woocommerce_emails' );

function crwc_custom_woocommerce_emails( $email_classes ) {

	//* Custom welcome email to customer when purchasing online training program

	$upload_dir = wp_upload_dir();
	
	require_once( $upload_dir['basedir'] . '/crwc-custom-emails/class-crwc-welcome-email.php' );
	$email_classes['CRWC_Welcome_Email'] = new CRWC_Welcome_Email(); // add to the list of email classes that WooCommerce loads


	return $email_classes;
	
}

Now, when you navigate to WooCommerce > Settings > Emails, you should be able to see the custom email Welcome Email that we added to the list of emails on that page. If you click on the Configure button, you will find settings screen that allows you to enable/disable the email, edit/update the email subject and heading and choose the email content type since we added these settings in the custom class we created above.

Creating custom email template

Until this point, we have been able to create email class that helps create email trigger and set-up email content and we have also been able to add our custom email to the WooCommerce Emails screen. We still need to define the email template that will be used for the email content. The paths to the email content templates have already been defined in the custom email class we created above. Let’s add the actual content that will be used by the welcome email we send out to customers.

Add the following code to crwc-welcome-email.php file (inside emails directory).

<?php
/**
 *
 * Welcome email content template
 *
 * The file is prone to modifications after plugin upgrade or alike; customizations are advised via hooks/filters
 *
 */
 
if ( ! defined( 'ABSPATH' ) ) {
	exit;
}

/**
 * @hooked WC_Emails::email_header() Output the email header
 */
do_action( 'woocommerce_email_header', $email_heading, $email ); ?>

<p><?php _e( 'Thank you for your purchase of Online training course. Your account has been successfully created over the Online Training Program portal.', 'woocommerce' ); ?></p>

<p><?php _e( 'Use the following credentials to login to the portal:', 'woocommerce' ); ?></p>

<p>
	<strong><?php __( 'Login URL: ', 'woocommerce' ) ?></strong><?php _e( 'https://example.com' ); ?><br />
	<strong><?php __( 'Username: ', 'woocommerce' ) ?></strong><?php echo make_clickable( esc_attr( $order->billing_email ) ); ?><br />
</p>

<p><?php _e( 'Below are the order details for your reference.' ) ?></p>

<?php
/**
* @hooked WC_Emails::order_details() Shows the order details table.
* @hooked WC_Emails::order_schema_markup() Adds Schema.org markup.
* @since 2.5.0
*/
do_action( 'woocommerce_email_order_details', $order, $sent_to_admin, $plain_text, $email );

/**
* @hooked WC_Emails::order_meta() Shows order meta data.
*/
do_action( 'woocommerce_email_order_meta', $order, $sent_to_admin, $plain_text, $email );

/**
* @hooked WC_Emails::customer_details() Shows customer details
* @hooked WC_Emails::email_address() Shows email address
*/
do_action( 'woocommerce_email_customer_details', $order, $sent_to_admin, $plain_text, $email );

/**
 * @hooked WC_Emails::email_footer() Output the email footer
 */
do_action( 'woocommerce_email_footer', $email );

You can modify the email content template as required based on your specific requirements and accordingly, the details that you’d need to send out to your customers.

Start making Custom WooCommerce email work

We’re almost there with starting to send custom WooCommerce emails to the customers. All we need to do is to trigger our code. The filter we added to include our custom email class to list of default email classes is placed in crwc-email-functions.php, but hey!, wait a sec.. did we actually include it so that it is executed by WordPress? No, not yet. Let’s do that.

In order to do so, you can just add the following code to your theme’s functions.php:

$upload_dir = wp_upload_dir();

include_once( $upload_dir['basedir'] . '/crwc-custom-emails/crwc-email-functions.php' );

That’s it! Now on, when a customer purchases an online training product from your store, he would receive a welcome email with his credentials. Sounds good, right? Happy customers, happy you!

This tut has been updated to work with WooCommerce 3.0+. Read how can you add and send custom WooCommerce email for WooCommerce version 3.0 and higher.

Categories
WordPress

Category Specific Search on Category Archives in WordPress

Search form in WordPress comes in real handy when you’d like to allow users to navigate through your website content. If the site structure is not so intuitive or even otherwise, when a user wants to quickly look for something specific on your website, the search form is really helpful.

For developers, there’s whole bunch of awesomeness with the default search form because it has plenty of scope for customization via hooks and filters.

In this tutorial, we will tweak the default search form in WordPress to fetch search results specific to the category on a category archives page. This way, the visitors on your site will be able to make a category specific search on a category archive page such that the results are displayed from within that particular category.

Customizing the default search behavior

We will make use of the get_search_form filter to achieve the desired results. Tweaking the search form to restrict the results specific to a particular category involves passing additional parameters to the search form. Add the following code to your functions.php to implement the category specific search through search form.

<?php
add_filter( 'get_search_form', 'cr_category_specific_search', 10, 4 );
function cr_category_specific_search( $form, $text, $button, $label ) {
	// Only run on category archives
	if ( ! is_category() )
		return $form;

	// Get the current category from query variable
	$category_id = get_query_var( 'cat' );
	$category_data = get_category( $category_id );
	$category = $category_data->slug;

	// Get search query; allow users to filter the placeholder text when idle
	$text = get_search_query() ? apply_filters( 'the_search_query', get_search_query() ) : apply_filters( 'cr_search_text', __( 'Search this website', 'cloudredux' ) . ' &#x02026;' );

	// 'Submit' button label
	$button = apply_filters( 'cr_search_button_text', esc_attr__( 'Search', 'cloudredux' ) );

	// Input label
	$label = apply_filters( 'cr_search_input_label', '' );    
	$value_or_placeholder = ( get_search_query() == '' ) ? 'placeholder' : 'value';

	// Default behaviour for form inputs
	$onfocus = "if ('" . esc_js( $text ) . "' === this.value) {this.value = '';}";
	$onblur  = "if ('' === this.value) {this.value = '" . esc_js( $text ) . "';}";

	// Search form
	$form  = sprintf( '<form class="search-form" itemprop="potentialAction" itemscope="" itemtype="http://schema.org/SearchAction" method="get" action="%s" role="search">', home_url( '/' ) );

	if ( '' == $label )  {
		$label = apply_filters( 'cr_search_text', __( 'Search this website', 'cloudredux' ) );
	}    

	$form_id = uniqid( 'searchform-' );

	// Add category slug as a hidden field to implement category specific search
	$form .= sprintf(
		'<meta itemprop="target" content="%s"/><label class="search-form-label screen-reader-text" for="%s">%s</label><input itemprop="query-input" type="search" name="s" id="%s" %s="%s" /><input type="hidden" name="category_name" id="category_name" value="%s" /><input type="submit" value="%s" /></form>',
		home_url( '/?s={s}' ),
		esc_attr( $form_id ),
		esc_html( $label ),
		esc_attr( $form_id ),
		$value_or_placeholder,
		esc_attr( $text ),
		esc_attr( $category ),
		esc_attr( $button )
	);

	return $form;
}

Displaying the category specific search form to visitors

We have already configured our search form to display category specific search results. Just to let the users know that they have the ninja ability to search within a category on our site, we may want to add a search form to category archive pages and indicate by modifying the placeholder text to guide the users. Add the following code to your functions.php to display a search form on category archive pages.

add_filter( 'cr_search_text', 'cr_category_archive_search_form_text', 20 );
function cr_category_archive_search_form_text( $search_text ) {
	if ( ! is_category() ) {
		return $search_text;
	}

	return __( 'Search this Category', 'cloudredux' );
}